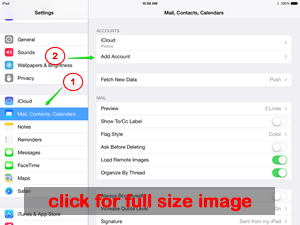
1) Go to SETTINGS and then click on the MAIL option as shown in the screenshot at left.
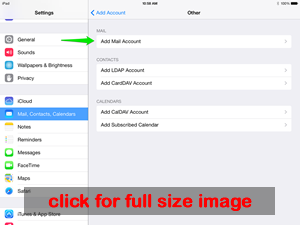
2) Click ADD MAIL ACCOUNT and then choose
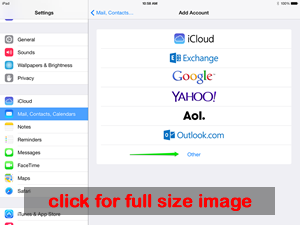
3) Choose OTHER from the account types to set up
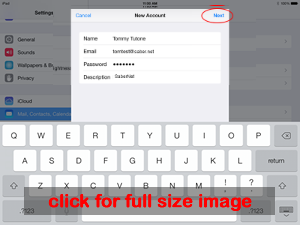
4) Fill in your name, full email address, and password. The description will automatically fill in but you can change that to whatever you want. Once everything is filled in, click NEXT.
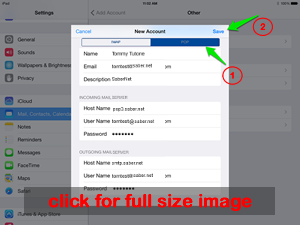
5) Now, click on POP at the top of the next screen (IMAP is likely pre-selected). Fill in the mail server information and other details as shown in the screen shot.
***if you want to use IMAP, you can. You just need to use imap.saber.net and port 143 for the incoming server information. All else would be the same as example images show.
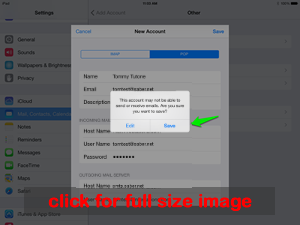
6) If the Mail app gives any error message about the mail server, override this. It may ask if you want to SAVE or EDIT, in which case choose SAVE.
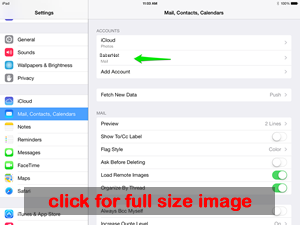
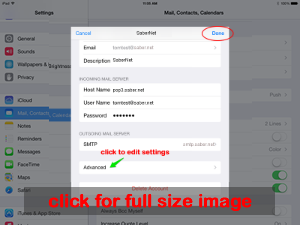
7) That should bring you back to the settings but you aren't quite done yet. The app will typically use the wrong port numbers for the outgoing (SMTP) server so we'll go back and change that and double check other items.
Click on the email name as shown on the list. In the example we made it "SaberNet" for the description so that is what needs to be clicked on. You may have typed in a different description.
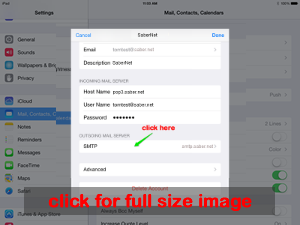
8) First we will check the OUTGOING MAIL SERVER details. Click as shown in the screenshot.
*NOTE: If you use another provider for internet access, such as Comcast, it is best to use that provider's info for the outgoing mail server. So, for example, with Comcast (in most cases) the server would be smtp.comcast.net, SSL needs to be ON, and the port is 465. For authentication use the login information for your Comcast account. If you aren't sure what it is, contact Comcast support. Step 10 below shows where you actually enter the info.
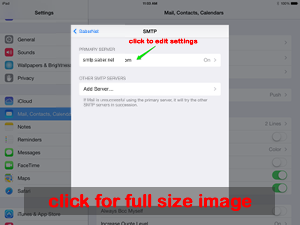
9) This will take you to the list of outgoing servers that have been set up. If you have more than one listed, be sure you click on the SaberNet entry to edit the settings.
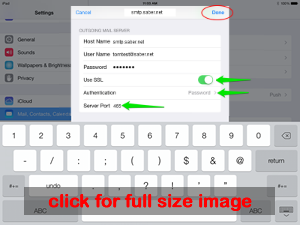
10) Verify your settings match the screenshot. Use SSL should be ON, Authentication should be PASSWORD and the Server Port should be 465 (not 587 as is usually the default for the Mail app).
If you use another provider for internet access, this is where you would enter their information for the outgoing server and login details.
Once your settings are verified, click DONE.
11) Now we will double check the ADVANCED settings.
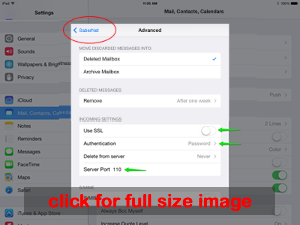
12) Verify your settings match what is shown for the items highlighted with the green arrows.
Once that information is verified, that should complete the setup.
You can test by sending a test email to yourself.